
Thank you for purchasing the Singular Motorsports Brake Ducts! The following instructions are applicable to both 2.5” and 3” models.
Our guide is focused on installation of our brake ducts without removal of the hub. If you are familiar with hub removal, you may install the brake ducts without cutting the OEM dust shield. The Front Hub Removal Guide on Miata.net covers the removal process if you prefer that method.
The following tools are required for the installation:
- Tin Snips
- 12mm Wrench – Dust Shield Bolts
- 14mm Wrench – Brake Caliper Bolts
Step 1:
Secure your vehicle on jackstands and remove the front wheels of the car.
Step 2:
Remove your brake caliper from the hub (Two 14mm bolts on the backside) and then remove the brake rotor. Take care to secure the brake caliper and do not let it hang freely from the line.
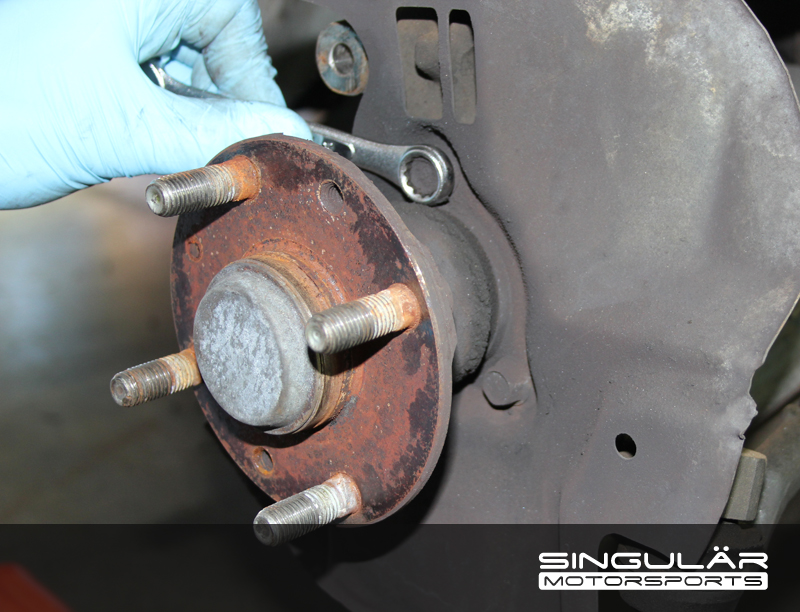
Step 3:
Remove the 12mm bolts (3 total) securing the dust shield into place. These bolts may be difficult to remove and be careful to not strip the bolt heads. If necessary soak the bolts with a penetrating oil first to aid removal:
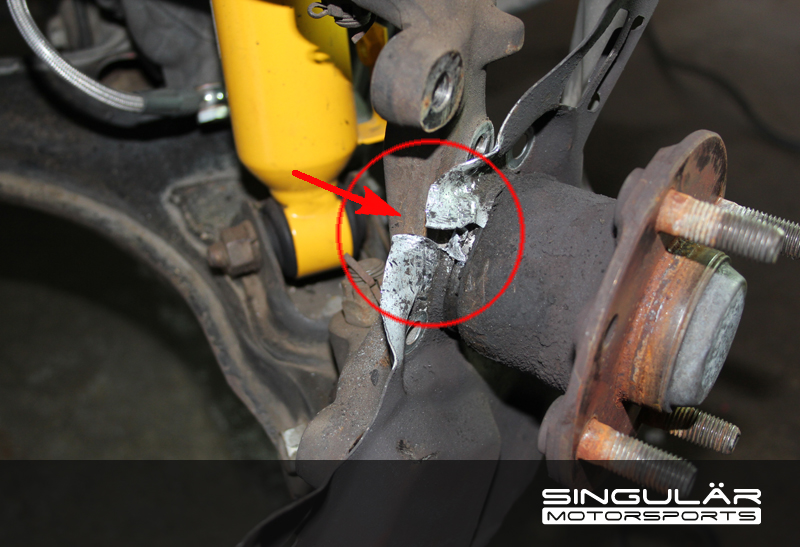
Step 4:
Using your tin snips, carefully cut into the dust shield at its narrowest point. (This area faces towards the rear of the vehicle). The photo below highlights the section to cut:
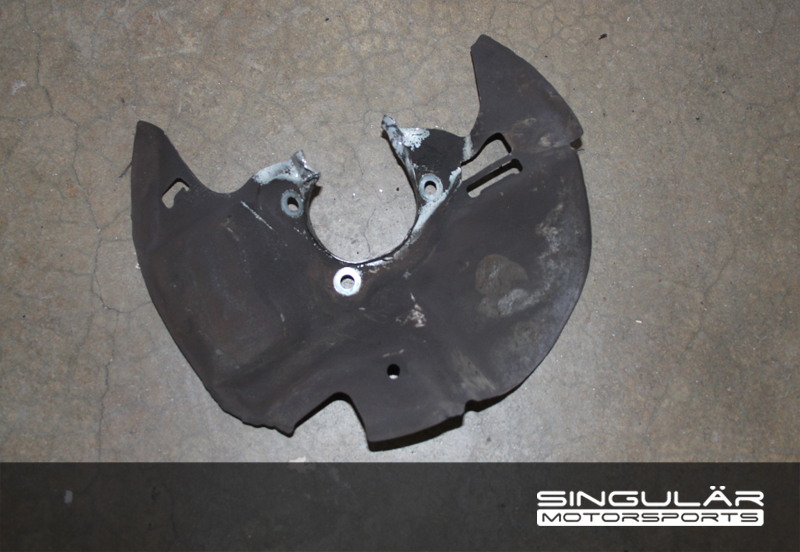
Step 5:
After cutting the dust shield with the tin snips as deep as the tip of the snips can get, there may be a small section still connected. The nose of the tin snips cannot get close enough to cut. Once you are down to this point, you can rock the dust shield back and forth to weaken the metal and pull the dust shield free. Here it is after removal:
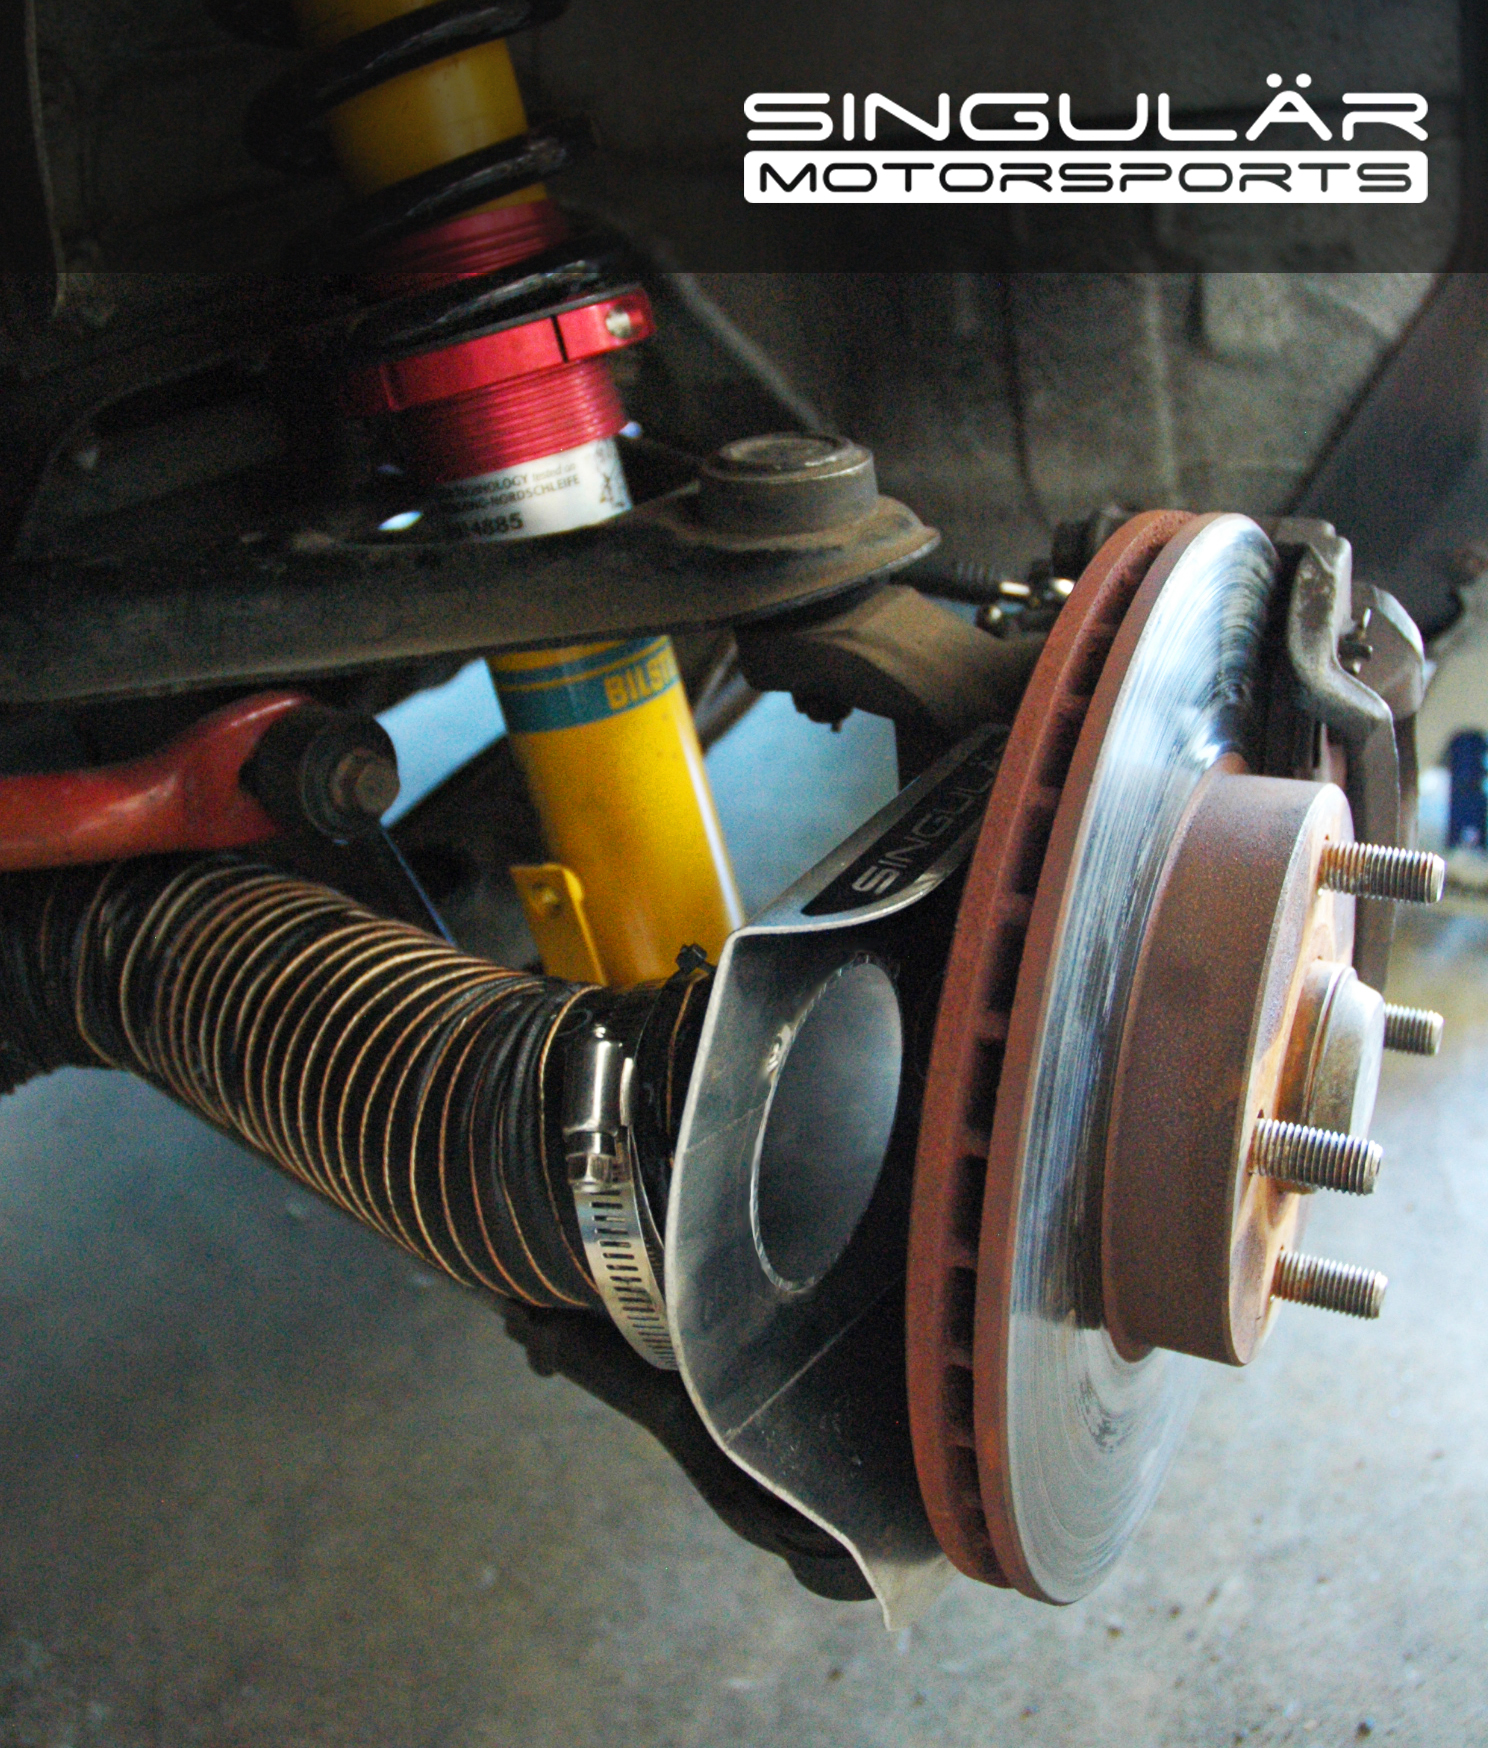
Step 6:
Install the Singular Motorsports brake duct with the OEM dust shield hardware. Re-install the brake rotor and caliper to verify clearance between the rotor, caliper and the brake duct. If there are any clearance issues, bend the brake duct carefully by hand while it is mounted to create the appropriate clearance between components.
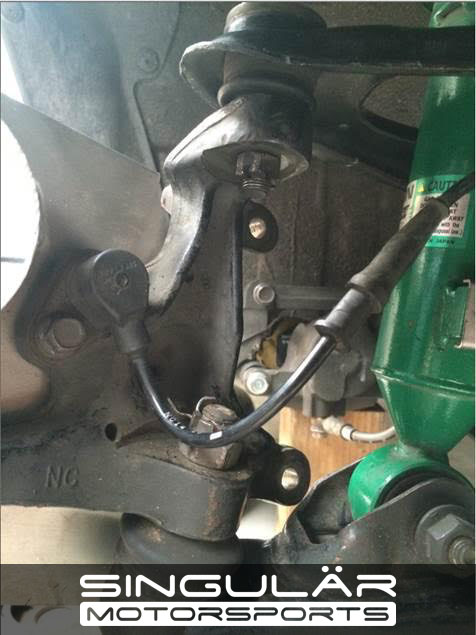
NOTE for ABS-equipped cars:
If your Miata has ABS, you will notice that the brake ducts want to occupy the same space as the wiring tail that comes off the front ABS/wheel speed sensor. This is easily solved by swapping your left ABS sensor to the right side of the car and vice versa. There is no difference between the sensors and they will plug right in to the wiring on the opposite side of the car.
Step 7:
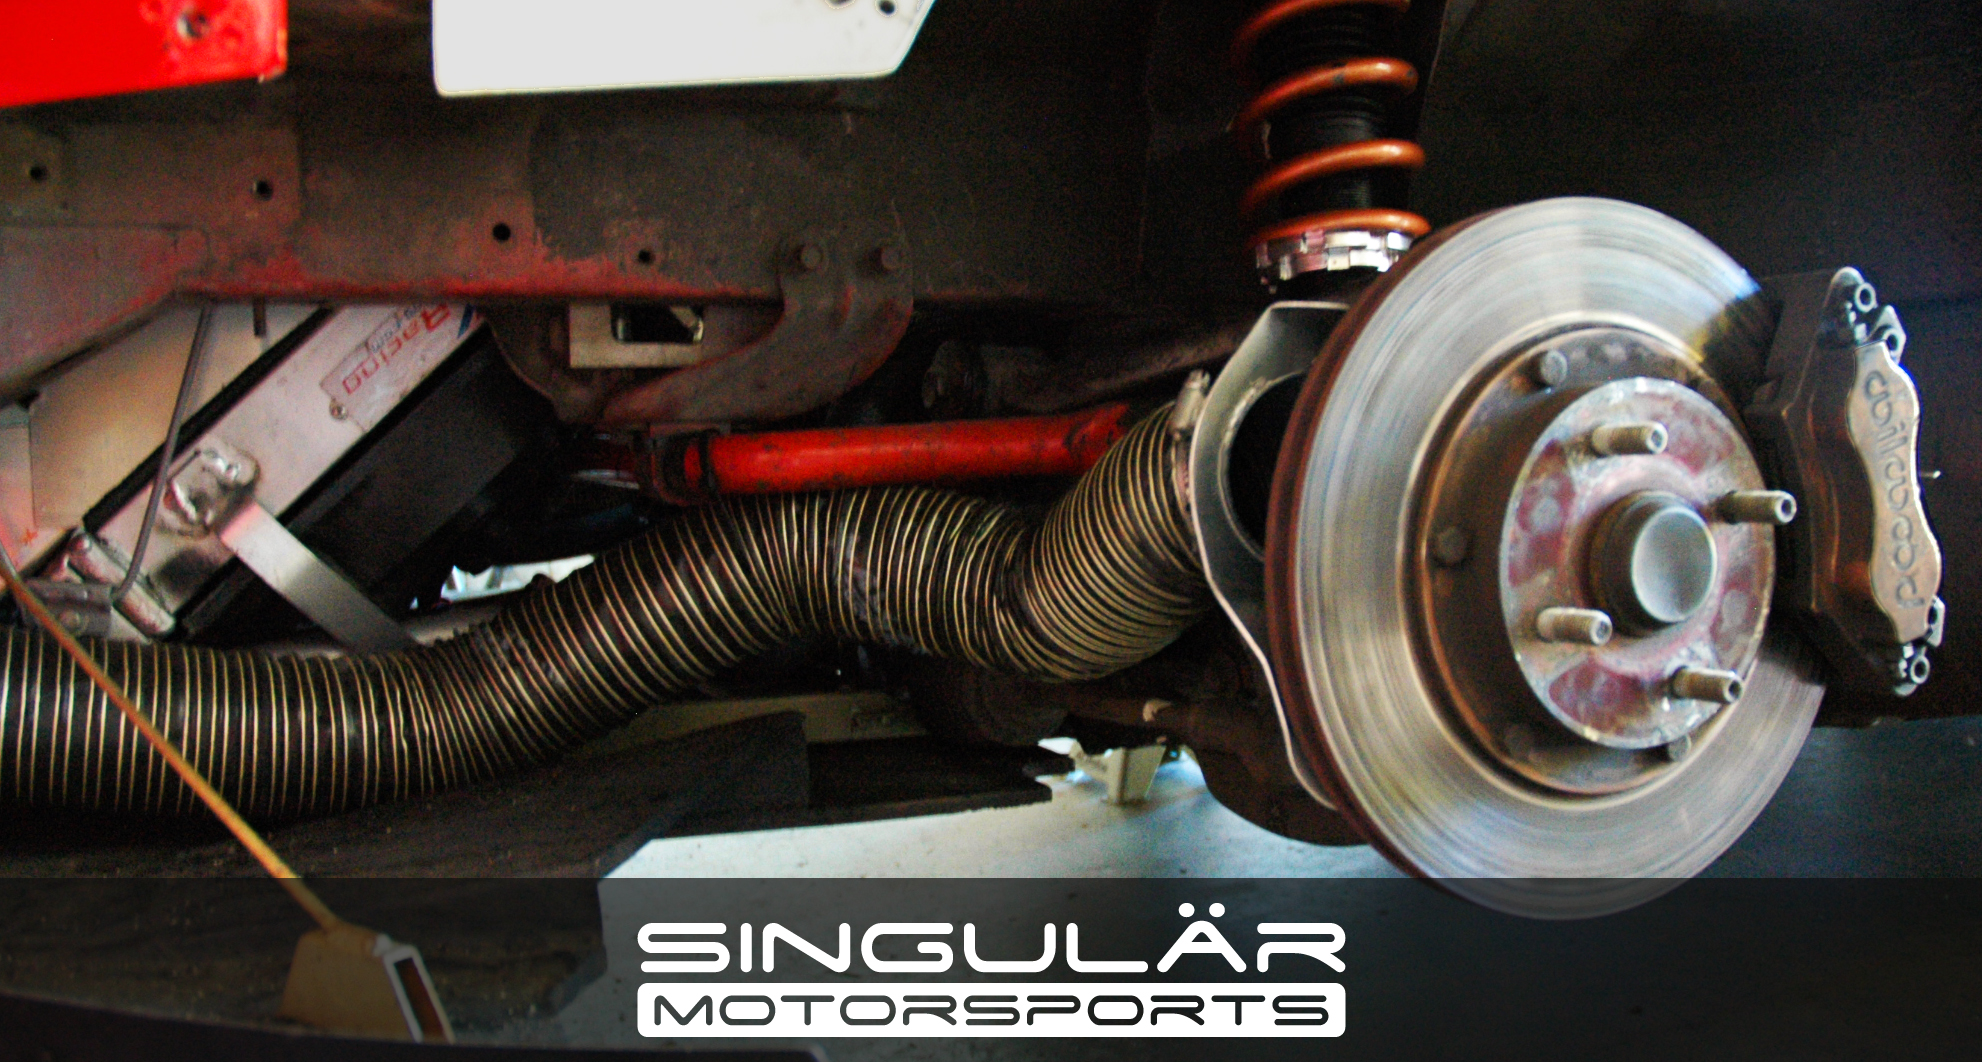
Route the hose for your brake ducts according to your vehicle’s space constraints and verify clearance with your wheel/tire combination. The inlet location for the hose is up to you, but here are some tips:
- Place the inlet in a high pressure location – the nose of the car is the highest pressure area of most vehicles.
- Close to the middle of the bumper is ideal, where airflow is directly in-line with the inlet opening. As the air moves sideways around the bumper shape, the air’s path is less in-line with an inlet opening that is further out towards the sides of the bumper.
- An inlet placed low on the bumper is much more effective if you have a splitter which builds pressure ahead of the opening. If you do not have a splitter, consider placing the inlet higher.
Step 8:
Enjoy!
And if you have ABS, remove hub.
Are there recommended hose providers? I tried a 2.5” high temperature aircraft hose but the tolerances were so tight it kept ripping while trying to install on the brake duct inlet tube.
Porterfield Brakes has ducting hose that you can use and it will hold up much better.
I already had ducting in the car, just zip-tied to the sway bar and blowing in the general direction of the rotors. Once I installed these ducts/guides from Singular, I tried to slip the 2 1/2″ ducting over the inlets but they don’t fit. Specifically, this was 2.5″ “350degree neoprene ducting” brake hose from racerpartswholesale (before they were bought-out and broken, part # THE-NN250).
Does the Porterfield ducting actually fit over the Singular inlets? I’ll obviously be replacing the hosing I’m using in order to get this connection to work so am shopping for what will actually work. – Thanks
Porterfield hose fits over the ducts just fine, that is what I use on my personal car. -Sean
Does it work with ABS?
Yup!
Do you install the hose so it opens to the front of the car to deliver cool air on the brakes. Or do you run it to to the back of the car.
Will the entire hose handle 400 degree F continuous or just the end at the brake pad.
Thanks
You want to supply the brake ducts with high pressure cold air from the front of the car, usually via an inlet in the front bumper.
If you use high quality silicone brake duct hose like ours, the entire hose is rated for those high temperatures.
Do you have any recommendations/ ideas for how to route ducting (NB2) if I can’t use the fog light holes? I have a supercharger oil cooler right behind the driver’s side fog light hole, and an engine oil cooler on the passenger side.
What if I simply pointed the ducting at the ground just inboard of the wheel? and/or maybe cut a round hole on either side of the undertray and routed them downward through there?
Thanks!
You don’t want to point them at the ground as it’s not a great source of air and it’s also easier to ingest rocks and stuff that you don’t want to throw at your brakes. But there are other options for inlets; we have universal inlets that can be placed anywhere – you just cut a circular hole and install the inlet there, so it doesn’t have to be in a fog light hole. If there’s some open space in another part of the bumper that would work well. Another option is to put the inlets inside the bumper opening – in the sides of the plastic tray that directs the air into the radiator. The radiator inlet is a high pressure zone so an inlet there will supply lots of air to the brakes even though the inlet isn’t forward-facing.